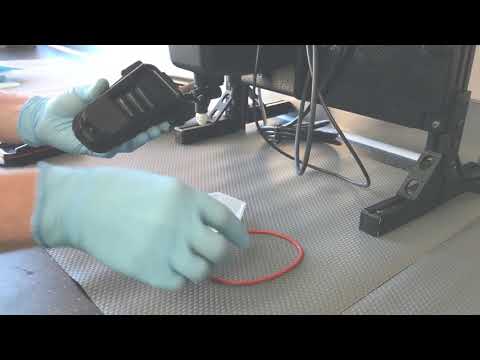
Fit the mounting cleat
Attach the mounting cleat to the wall or instrument backboard.


Practical guidance and video demonstrations for installing, checking and caring for your Lovibond turbidimeter.
These 11 tutorials cover installation and routine care of the Lovibond PTV 1000 online turbidity analyser. Use them alongside the current instruction manual for your optical model and the procedures approved at your site.
Choose a topic below, then watch the relevant procedure. For advice on your installation or instrument configuration, our team is here to help.
Start with a secure mounting and the correct flow-body assembly.
Attach the mounting cleat to the wall or instrument backboard.
Follow the installation sequence for the fluidics manager module.
Choose the guide that matches the primary standard you are using.
Perform calibration using a bottled primary calibration standard.
Assign a reference value before using a dry verification block.
Assign a value to the high-level block. The same baseline procedure applies to the low-level block.
Find the guide for the component you need to inspect or replace.
Disassemble the drain cover, replace the O-ring and siphon tube, inspect the flow switch and remove the body from its cleat.
Disassemble the integrated bubble trap and replace its O-ring.
This tutorial opens on YouTube because the owner has disabled playback on other websites.
Follow the maintenance and replacement procedure for the light beam dump.
Follow the replacement procedure for the bubble-trap knob.

Find out how the PTV 1000 supports low-level drinking water turbidity monitoring, and explore the technical resources.
Calibration uses the specified formazin-based primary standard to establish the instrument response. The T-CALplus demonstrations show the handling and connection sequence for the PTV 1000.
Check the correct standard, its condition and the manufacturer’s instructions. Keep the flow body and calibration connections clean, and allow the result to stabilise before accepting it.
Verification checks the measurement against a reference without adjusting the calibration. A dry verification block needs an assigned value and should be used in accordance with the matching instrument procedure.
Record the result and investigate a failed check. Do not reassign the block’s value simply to conceal a deviation.

For a drifting or unstable result, first establish what changed: the water sample, sample flow, instrument cleanliness or measurement settings. A reading alone cannot identify the cause.
Send PMA your model, optical method, recent trend, alarms, calibration and verification records, and details of the sampling arrangement. Our team can help you identify a practical next step.
Set maintenance frequency from the manufacturer’s guidance, site quality procedures and actual sample conditions. These videos do not establish a universal service interval.
Review sample flow, tubing, drainage and the bubble trap. Inspect for deposits, leakage or trapped air before attributing a change entirely to the treatment process.
Follow the relevant flow-body and bubble-trap demonstrations. Use the designated cleaning equipment and method, and avoid contaminating calibration connections.
Record cleaning, calibration, verification and any configuration changes. Review the return to a stable measurement before relying on the trend for operational decisions.
See the PTV 1000 brochure and technical specification. Ask PMA for the current instruction manual for your supplied configuration.
The publisher has disabled embedding for this particular video. The thumbnail opens the original YouTube tutorial; the other available demonstrations remain on this page.
Check the reference, cleanliness, installation and procedure, then follow your site’s escalation process. Contact PMA with the records and instrument details rather than adjusting values without establishing the cause.
Use the demonstrations as supporting material. Follow your site procedures and the correct manufacturer manual, including electrical and chemical handling instructions.
Follow the next step that fits your application or instrument.
Explore the instrument, optical configurations and technical resources.
Assess sample points and practical conditions after drinking-water filtration.
Compare methods, sample handling and operating requirements.
For other water matrices and instruments, explore PMA’s turbidity measurement overview.
Speak to the PMA team about your instruments, reagents or service requirements. Tell us what you need, and we’ll help you find the right next step.
Trusted by our clients


Share your requirements below. All fields are required.
Your enquiry goes directly to our team. Your details are used to respond to you, and you won’t be added to a marketing database. Read our privacy policy.
To find out more about our range of sensors, request a callback or ask a technical question, our expert staff are always on hand. Our focus has always been to deliver world-class customer service.
Get startedWe use optional Google Analytics cookies to understand which pages are useful. Analytics stays off unless you accept. Read our privacy statement.